Flask is one of the most popular web application framework, it’s simple and lightweight framework for Python. At the time this writing, Flask version 2.3.x supports Python 3.8 and newer. We will prepare the application development environment with the latest version of Python and Flask.
Most of the latest Linux distributions ship the latest release of Python 3.11. Depend on the operating system, you may install Python from package manager.
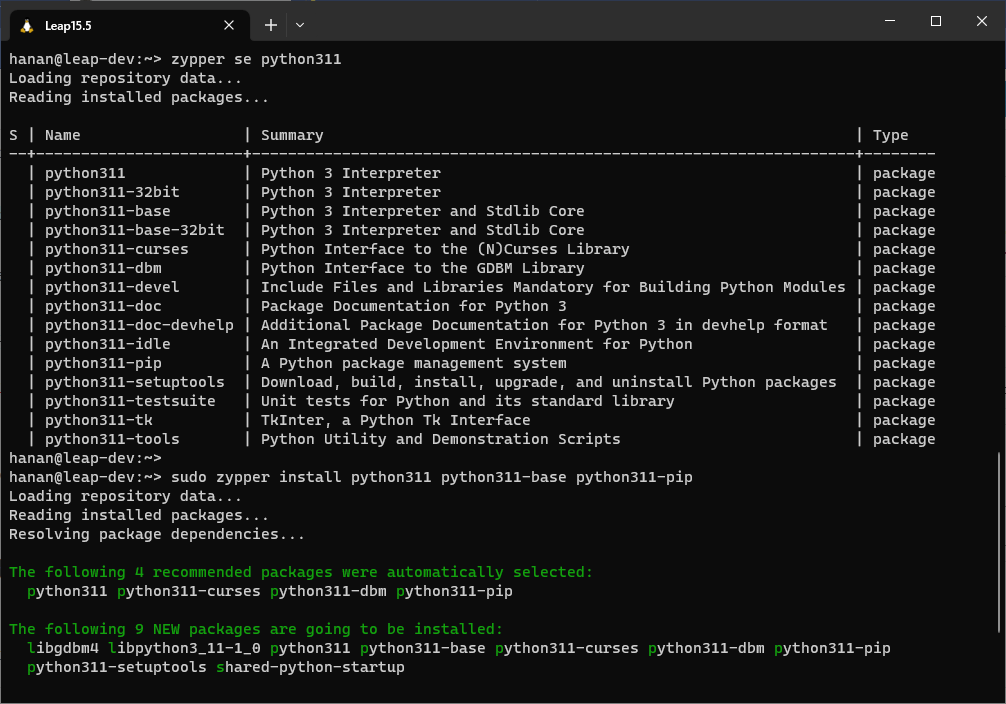
In openSUSE, you can install Python 3.11 with this command:
sudo zypper install python311 python311-base python311-pip
In RHEL 9, use DNF for installing Python 3.11:
sudo dnf install python3.11 python3.11-pip
Debian 12 (Bookworm) currently contains 3.11, but you need to install the Virtual Environment that it will be used for the development environment:
sudo apt install python3-venv
If you use Windows as development environment, the winget package manager can be used to download Python 3.11:
winget install Python.Python.3.11
You may download the source code and binary for your operating system from python.org .
Working with Virtual Environment
Use a virtual environment to manage the dependencies for your project, both in development and in production. A virtual environment is created on top of an existing Python installation, known as the virtual environment’s “base” Python, and may optionally be isolated from the packages in the base environment, so only those explicitly installed in the virtual environment are available.
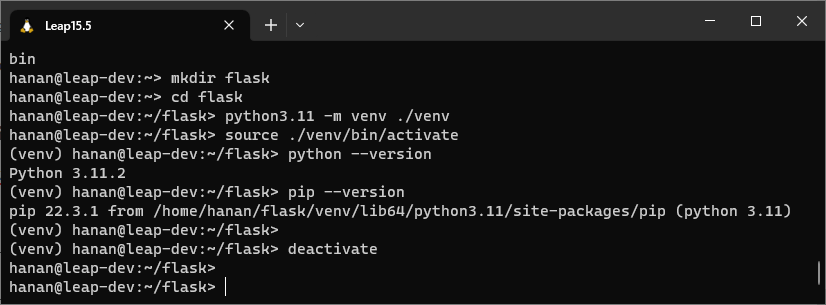
Make a folder named ‘flask’ and create the virtual environment in it with following command:
mkdir flask
cd flask
python3.11 -m venv ./venv
Activate the virtual environment with this command:
source ./venv/bin/activate
If you want to exit the development environment, you can execute the deactivate command
Installing Flask with PIP
Don’t forget that we’re working in the virtual environment, if you haven’t entered into the virtual environment you can activate it first.
cd ~/flask
source ./venv/bin/activate
We use pip as package installer to install flask packages in our virtual environment. Make sure we have the latest version of pip:
python -m pip install --upgrade pip
Install Flask with the pip command:
pip install flask
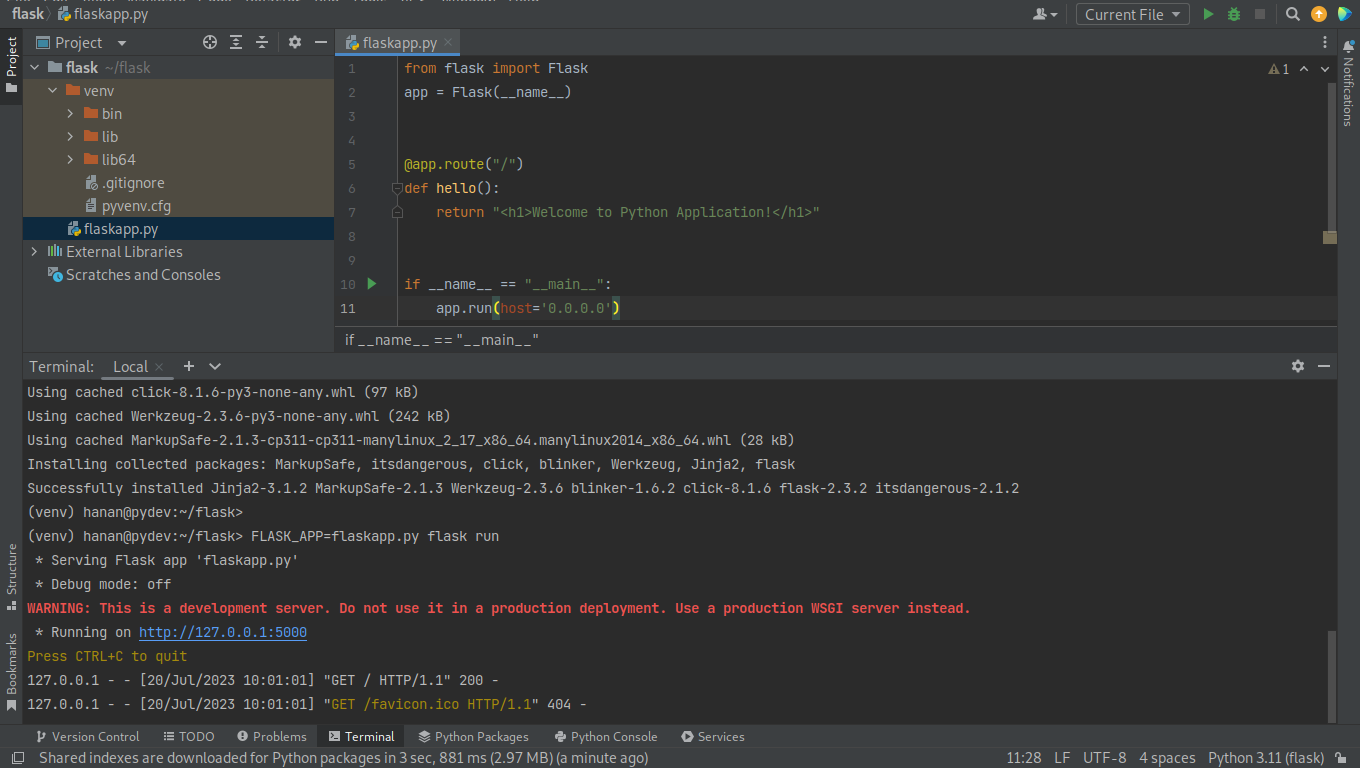
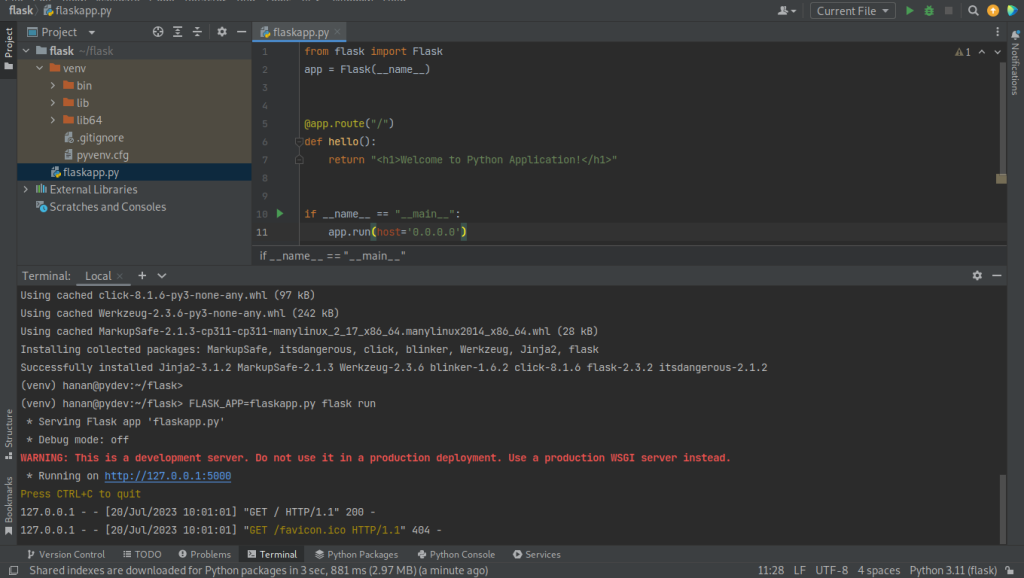
Create the very first flask application named flaskapp.py with nano or any code or any IDE you have.
nano flaskapp.py
from flask import Flask
app = Flask(__name__)

@app.route("/")
def hello():
    return "<h1>Welcome to Flask Application!</h1>"

if __name__ == "__main__":
    app.run(host='0.0.0.0')
We’ll use the flask command to run the application, but before that, we need to tell the shell the application to work with by setting the FLASK_APP environment variable:
export FLASK_APP=flaskapp.py
flask run
Another way to run the flask application is by running with the command: python flaskapp.py
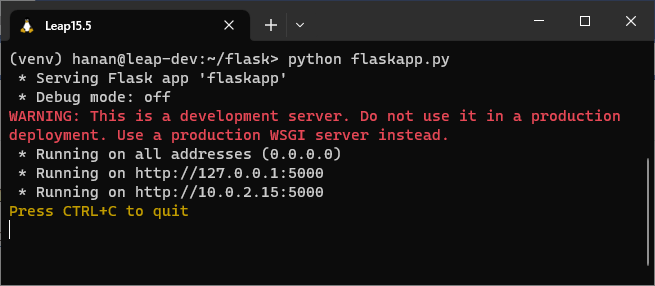
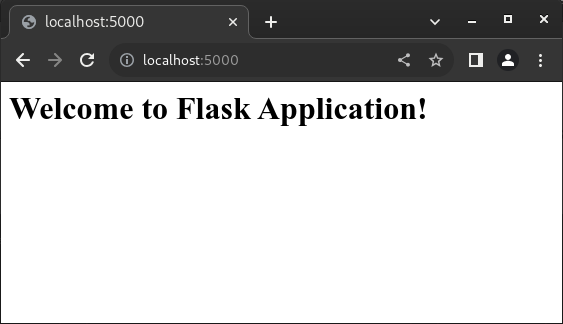
Navigate the browser to open your Flask application at http://localhost:5000.
Running Application in the Container
The container allows applications to be bundled with their own libraries and configuration files. Inside the container, binaries are included along with all the dependencies needed to keep the application running. This approach ensures the application behaves consistently in all environments, from a developer laptop to a production environment.
For example I built the container image that contains Python packages along with Flask libraries and their dependencies.
FROM registry.opensuse.org/opensuse/leap:15.5

# STEP 1 - INSTALL THE PACKAGES
RUN set -eux; \
    zypper refresh -b; \
    zypper -n update; \
    zypper -n install python311 python311-base python311-pip; \
    zypper clean --all

# STEP 3 - INSTALL FLASK PACKAGES
RUN pip3.11 install --no-cache-dir Flask flask-babel Flask-BabelEx Flask-WTF Flask-Admin Flask-HTMLmin \
    Flask-SQLAlchemy Flask-Migrate Flask-Testing Flask-Mailing pytest-flask\
    Flask-Compress Flask-HTTPAuth Flask-Login Flask-JWT-Extended Flask-Security-Too Flask-Paranoid \
    Flask-RESTful Flask-Cors flask-restx Flask-OAuth

# STEP 4 - WORKING WITH FILES
RUN mkdir /app
WORKDIR /app
COPY flaskapp.py /app

# STEP 5 - FINALIZING
ENV LISTEN_PORT=5000
EXPOSE 5000
ENTRYPOINT ["/usr/bin/python3.11", "flaskapp.py"]
I’ve used openSUSE Leap as container base image (registry.opensuse.org/opensuse/leap:15.5), you might use the different base image that suits your workflow such as Debian Base Image or RHEL Universal Base Image. Pull the ready-to-use image hananmyid/flaskapp from Docker Hub and run the Flask application in the container.