
Containerization is a reliable solution to run multiple tasks or applications on the same host. The container allows applications to be bundled with their own libraries and configuration files, and then executed in isolation on a single OS kernel. It ensures application isolation in terms of security and data access, and as resource allocation.
A container image is a template containing a set of instructions for creating a container. It provides a convenient way to package up applications and preconfigured server environments, which you can use for your own private use or share publicly with other users.
Alpine is ideal for creating small and efficient container images, which can reduce the build time, the storage space, and the network bandwidth. It is designed to be simple, fast, and secure, with minimal dependencies and features. The image weighs in at under three megabytes, this makes it fast to download, it also means that Alpine container places minimal load on your system.
Before we begin to build the container images, let’s define a base image and a layered image. In simple terms, a base image is an empty first layer, which allows you to build your container images from scratch. When you create a container image, most Dockerfiles start from a parent image, a layered image adds a collections of layers on top of the parent image in order to install, configure, and run an application. Layered images reference base images in a Dockerfile using the FROM instruction:
FROM alpine:latest
If you need to completely control the contents of your image, you might need to create a base image instead. A base image has FROM scratch in its Dockerfile.
For example we use Alpine’s root filesystem to build our base image:
wget -O - https://dl-cdn.alpinelinux.org/alpine/v3.18/releases/x86_64/alpine-minirootfs-3.18.2-x86_64.tar.gz | gunzip -c > rootfs.tar
Create a Dockerfile that contains commands:
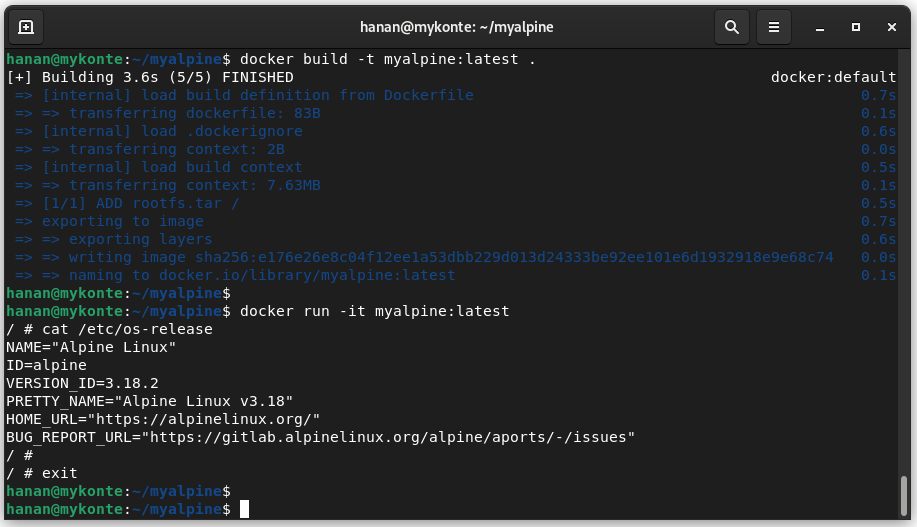
# Dockerfile commands
FROM scratch
ADD rootfs.tar /
CMD ["/bin/sh"]
Build the image with this command:
docker build -t myalpine:latest .
To build a layered image that uses Alpine base image, you only need to specify a parent base in the FROM line instruction. For example we build a simple NGINX:
FROM alpine:latest

RUN set -eux; \
    apk update --no-cache; \
    apk upgrade --no-cache; \
    apk add --no-cache nginx

EXPOSE 80

ENTRYPOINT ["/usr/sbin/nginx", "-g", "daemon off;"]