
In the previous post, I’ve written about playing the container operating system with openSUSE MicroOS, and now moving on using it as Docker runtime. MicroOS designed to host container workloads with small environment for deploying containers, we will benefit the MicroOS’ container host features for running as Docker runtime in the development machine and accessing it via Windows Subsystem for Linux (WSL).
It takes advantage of a client-server model. we need MicroOS installed on VirtualBox as a server and accessing it with openSUSE Leap distribution installed on WSL. When you execute a Docker command in WSL, Docker connects to the MicroOS server via SSH.
At the end of this writing, we’d play acting like a WordPress developer who builds plugins and themes for WordPress with simplest way.
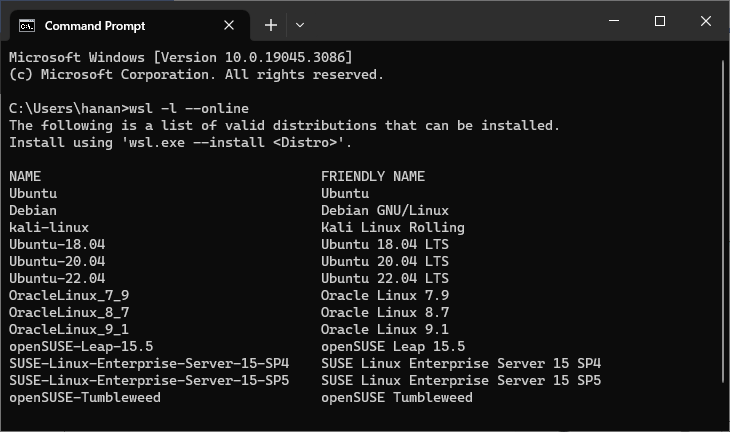
Let’s begin! We need openSUSE Leap from WSL distribution. If you don’t have it, install with this command in Command Prompt:
C:\> wsl --install -d openSUSE-Leap-15.5
(Update 8 July 2023: openSUSE Leap 15.5 is one of available online distribution replacing Leap 15.4)
Update the latest software packages:
sudo zypper refresh
sudo zypper update
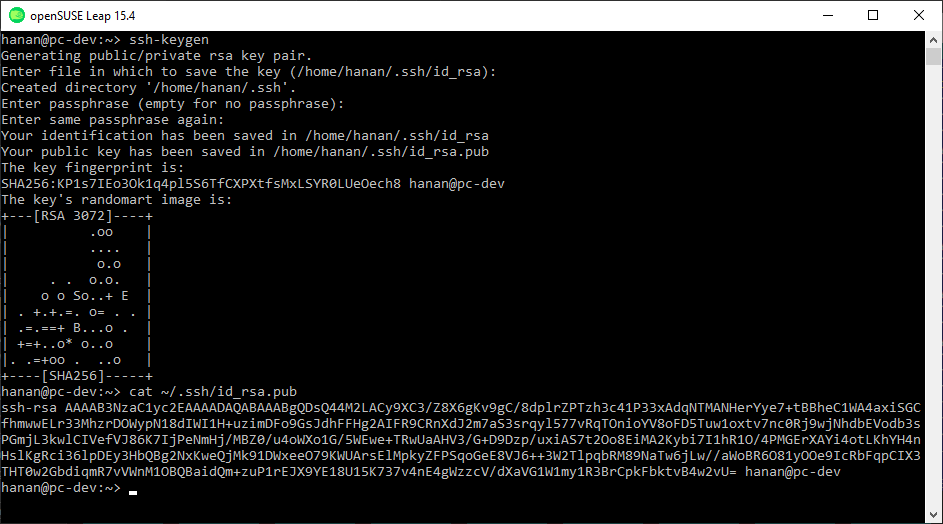
Generate public/private rsa key pair with the ssh-keygen command and copy the public ssh key. This public key will be used to access MicroOS.
Install MicroOS in VirtualBox
Download MicroOS from https://en.opensuse.org/Portal:MicroOS/Downloads, choose VirtualBox Base System. Extract the vdi.xz archive that will be used as VirtualBox virtual disk.
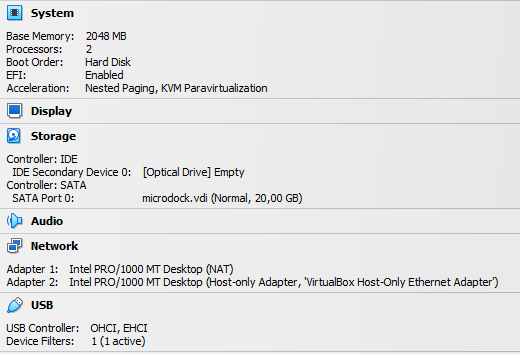
Create a new virtual machine with the specification described by this picture:
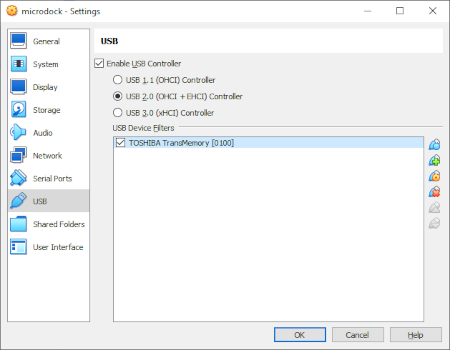
Setup a dedicated USB drive for creating Combustion. Combustion is a script to configure MicroOS on the first boot. In this script, you can set a password and copy the public ssh key that was generated in WSL before. For information about about Combustion, you might visit this page https://en.opensuse.org/Portal:MicroOS/Combustion. Attach your USB drive to MicroOS VM and run the virtual machine.
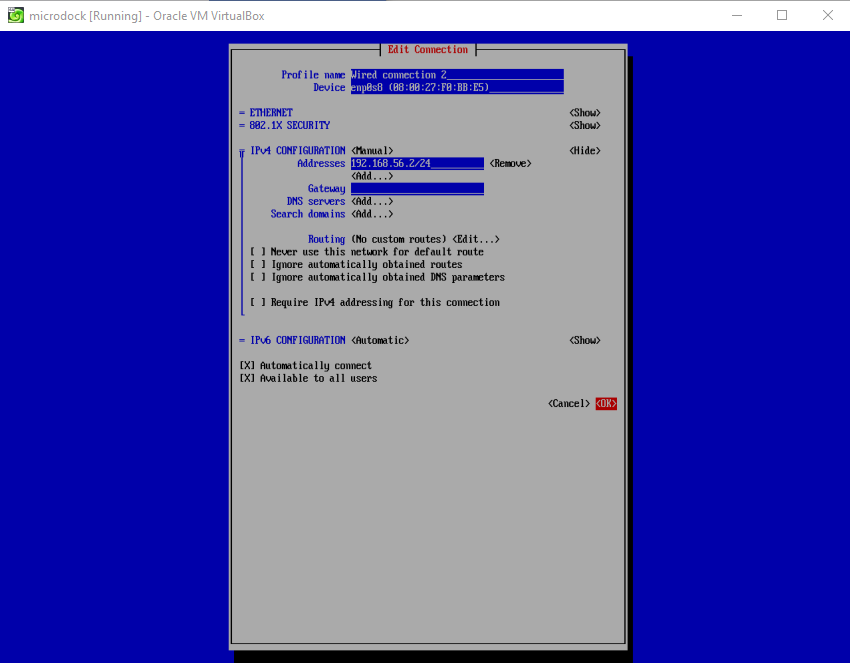
After MicroOS has been installed in VirtualBox, change the address of Network Adapter 2 with static IP address. Use the nmtui progam and give it the static address. I set to 192.168.56.2/24, you may change the address suits you. This IP will be used for accessing MicroOS.
Login to MicroOS with ssh [email protected] and install Docker packages with transactional-update:
transactional-update pkg install docker
systemctl restart
After restarting MicroOS, run the Docker daemon:
systemctl enable --now docker.service
Access MicroOS Docker via WSL
Run WSL (openSUSE Leap) and install Docker packages with the zypper install command.
sudo zypper install docker docker-compose
Open the .profile file and insert the export command for accessing remote Docker to MicroOS.
vim ~/.profile
# ...
export DOCKER_HOST="ssh://[email protected]"
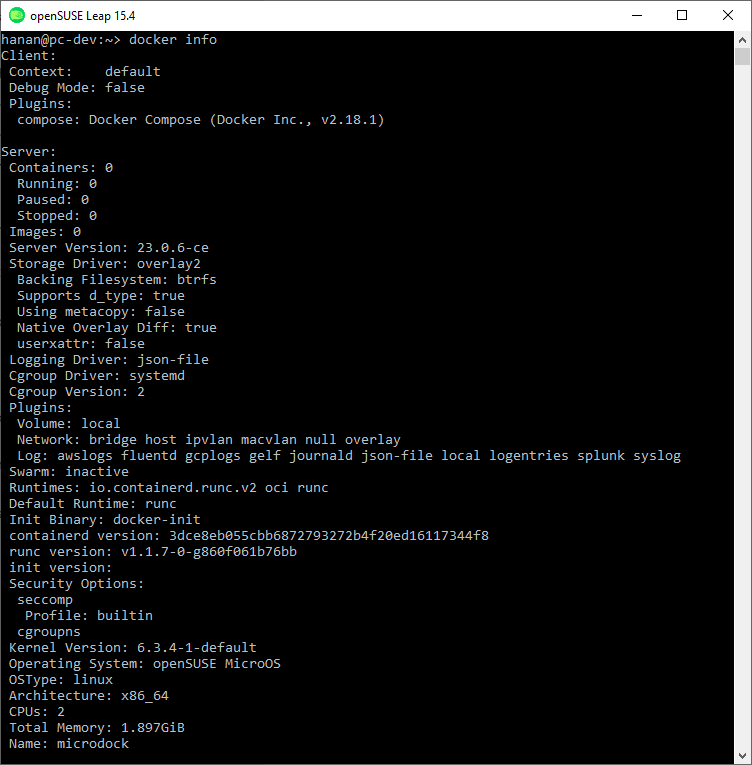
Run the docker info command, you’ll see the information that your Docker is accessing the MicroOS Docker runtime. If it didn’t work for the first time, you probably have to terminate your WSL (Leap) and running the WSL terminal again.
Let’s try to run a Docker container with this command:
docker run -it opensuse/leap:latest bash
Running WordPress with Docker Compose
It’s time to play deeper with Docker Compose, a Docker plugin that defining and running multi-container Docker applications. Let’s say we want to develop WordPress plugins and themes in WSL environment that integrated with Visual Studio Code.
We’ll work with Docker Compose in the wpdock directory and create the docker-compose.yml file. This file contains the service definitions for the containers setup.
mkdir wpdock
cd wpdock
vim docker-compose.yml
services:
  db:
    image: mysql:8.0.27
    command: '--default-authentication-plugin=mysql_native_password'
    volumes:
      - db_data:/var/lib/mysql
    restart: always
    environment:
      - MYSQL_ROOT_PASSWORD=rootpassword
      - MYSQL_DATABASE=wordpress
      - MYSQL_USER=wordpress
      - MYSQL_PASSWORD=wordpress
    expose:
      - 3306
      - 33060
  wordpress:
    image: wordpress:latest
    volumes:
      - wp_data:/var/www/html
    ports:
      - 8000:80
    restart: always
    environment:
      - WORDPRESS_DB_HOST=db
      - WORDPRESS_DB_USER=wordpress
      - WORDPRESS_DB_PASSWORD=wordpress
      - WORDPRESS_DB_NAME=wordpress
volumes:
  db_data:
  wp_data:
After creating the simple setup of Docker Compose above, running it with this command:
docker compose up
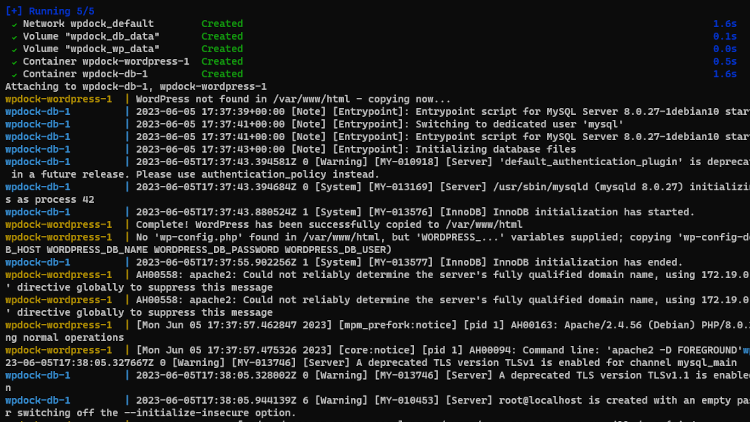
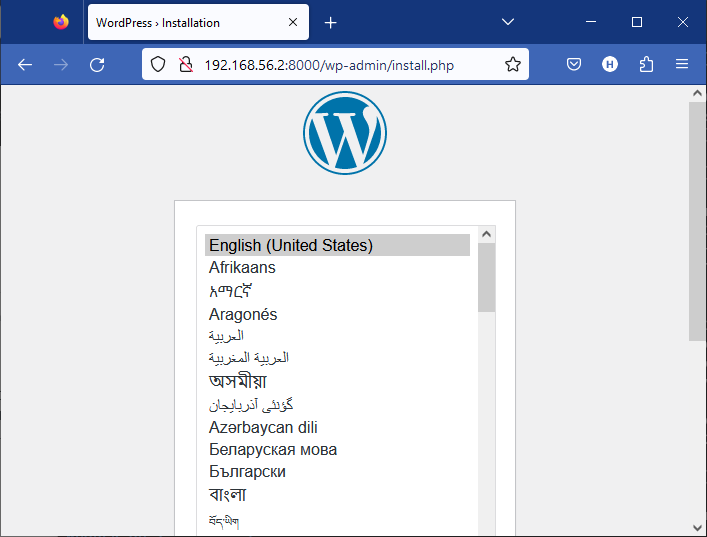
You may start all of the Docker containers in the background with adding the -d option, they will be run in “detached” mode. Open your browser navigate to http://192.168.56.2:8000 to make sure everything is running just fine.
To stop all of the containers, you may simply press Control + C to stop the container’s execution. Or, if the containers are running in the background, you may use the stop command:
docker compose stop
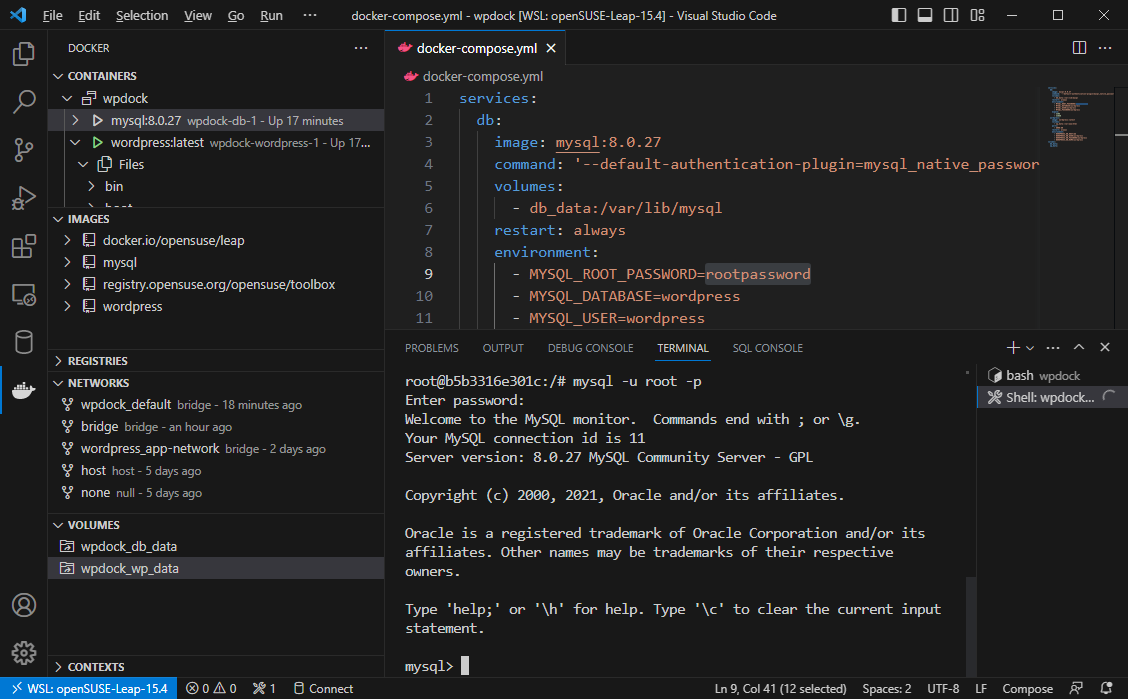
Visual Studio Code Integration
This is the last step, opening the wpdock application in Visual Studio Code that integrated with WSL environtment and Docker.
cd wpdock
docker compose up -d
code .
The WSL extension has to be installed in Visual Studio, if you don’t have it, launch the quick open (Ctrl+P), paste the following command, and press enter.
ext install ms-vscode-remote.remote-wsl
Another extension you may have to install in Visual Studio is Docker extension. It make you easy to create, manage, and debug containerized applications.
ext install ms-azuretools.vscode-docker
That’s it, you’re a WordPress developer now but advance. Have a lot of fun ya 🥳