

Cockpit has included in openSUSE Leap starting by 15.6. This integration improves usability and access as well as providing a link between advanced system administration and user-friendly operations from the web browser.
Before install, make sure the system is up-to-date: sudo zypper ref -f; sudo zypper up
Install it from zypper and enable running at startup with these commands:
$ sudo zypper install cockpit
$ sudo systemctl enable --now cockpit.socket
You may search additional cockpit packages with:
$ zypper search cockpit
S  | Name                     | Summary                         | Type
---+--------------------------+---------------------------------+-----------
i+ | cockpit                  | Web Console for Linux servers   | package
   | cockpit                  | Web Console for Linux servers   | srcpackage
i  | cockpit-bridge           | Cockpit bridge server-side co-> | package
   | cockpit-bridge-debuginfo | Debug information for package-> | package
   | cockpit-debuginfo        | Debug information for package-> | package
   | cockpit-debugsource      | Debug sources for package coc-> | package
   | cockpit-devel            | Development files for for Coc-> | package
   | cockpit-doc              | Cockpit deployment and develo-> | package
   | cockpit-kdump            | Cockpit user interface for ke-> | package
   | cockpit-networkmanager   | Cockpit user interface for ne-> | package
   | cockpit-packagekit       | Cockpit user interface for pa-> | package
   | cockpit-pcp              | Cockpit PCP integration         | package
   | cockpit-pcp-debuginfo    | Debug information for package-> | package
   | cockpit-selinux          | Cockpit SELinux package         | package
   | cockpit-storaged         | Cockpit user interface for st-> | package
i  | cockpit-system           | Cockpit admin interface packa-> | package
i  | cockpit-ws               | Cockpit Web Service             | package
   | cockpit-ws-debuginfo     | Debug information for package-> | package
For example, if you want to install the other packages such as cockpit-packagekit and cockpit-storaged, or maybe you use NetworkManager instead Wicked:
sudo zypper install cockpit-packagekit cockpit-storaged cockpit-networkmanager
Open the firewall if necessary:
$ sudo firewall-cmd --permanent --zone=public --add-service=cockpit
$ firewall-cmd --reload
Point your web browser to: https://ip-address-of-machine:9090. Use your system user account and password to log in.

Root login into cockpit is disabled by default. If you prefer root login, over privileged user account access, then simply edit and remove root from disallowed-users and a restart of service.
$ sudo vim /etc/cockpit/disallowed-users
$ sudo systemctl restart cockpit.socket
HTTPS Connection with Let’s Encrypt Certificate
Cockpit usually requires that web browsers communicate with it using HTTPS, for security reasons. Cockpit will load a certificate from the /etc/cockpit/ws-certs.d directory. If no certificate is found, a self-signed certificate is created and stored in the 0-self-signed.cert file.
To install an SSL certificate, you must generate a key and certificate signing request (CSR). The key is used to create the certificate, and the CSR is sent to a Certificate Authority (CA) to get the certificate. We will use the Certbot utility to get an SSL certificate from Let’s Encrypt, a free and open certificate authority.
Install the python3-certbot package:
sudo zypper install python3-certbot
Now, you can run the command below to get an SSL certificate.
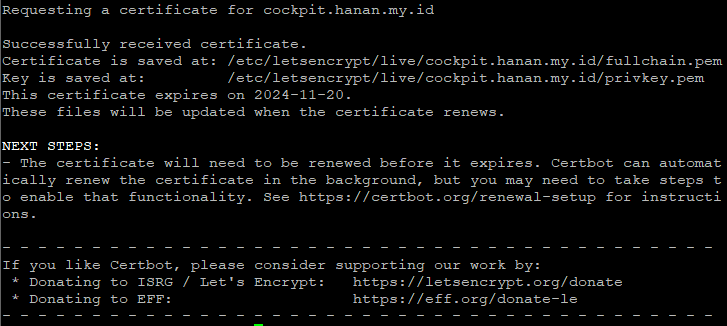
sudo certbot certonly --standalone --agree-tos --email your_email -d cockpit.your_domain
Where:
certbotis the command you used to run Certbot.certonlyis the subcommand that allows you to generate a SSL certificate.--standaloneis used to run a standalone webserver for authentication.--agree-tosis used to agree to the Let’s Encrypt Subscriber Agreement and provide an email address where they can report issues during the registration process.--emailyour_email-d cockpit.your_domainis used to specify the email address and domain you want to secure with the SSL certificate. Replaceyour_emailwith your email address andcockpit.your_domainwith the domain you want to secure.
Once the Certbot process is complete, you will have your certificate files in the /etc/letsencrypt/live/cockpit.your_domain directory.
The next step is creating a combined certificate and key file and then save it in the .cert format.
sudo bash -c "cat /etc/letsencrypt/live/cockpit.your_domain/fullchain.pem /etc/letsencrypt/live/cockpit.your_domain/privkey.pem > /etc/cockpit/ws-certs.d/cockpit.your_domain.cert"
Once you have created the certificate and key file, restart the cockpit service to load the new SSL certificate.
sudo systemctl restart cockpit.socket
Navigate to https://cockpit.your_domain:9090, click on the padlock in the address bar, and see a Connection is a secure message. Means, the certificate is successfully installed.
Enable Two-Factor Authentication (2FA)
Two-Factor Authentication or 2FA is a way extra security to protect Cockpit. You can restrict 2FA to cockpit logins with the PAM Google Authenticator.
Install a google-authenticator-libpam package:
sudo zypper install google-authenticator-libpam
Then generate the QR code with the secret keys:
google-authenticator -t -d -f -r 3 -R 30 -W
After you have a QR code with the secret keys and some recover codes, add at the end of the /etc/pam.d/cockpit file: auth required pam_google_authenticator.so nullok
sudo bash -c 'echo "auth required pam_google_authenticator.so nullok" >> /etc/pam.d/cockpit'
sudo systemctl restart cockpit
nullok means if you have not 2FA in your home, you can still login.